Follow Me On Social Media!
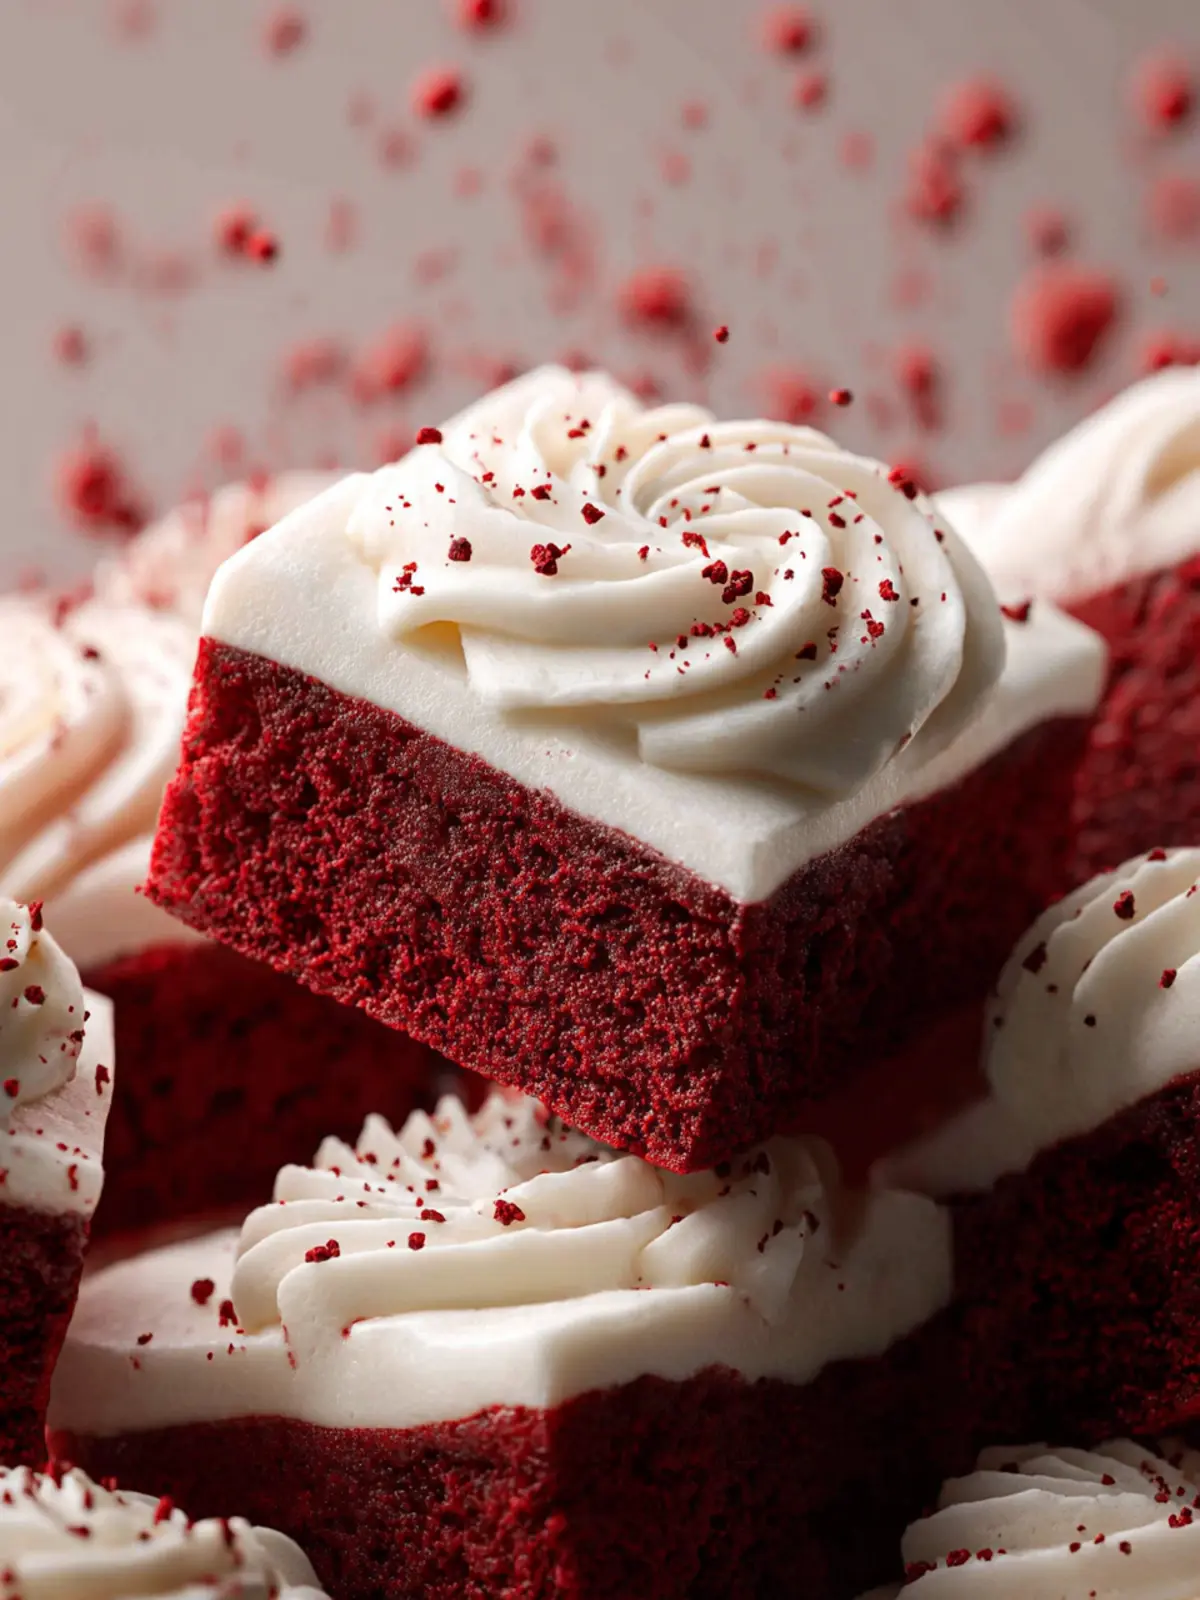
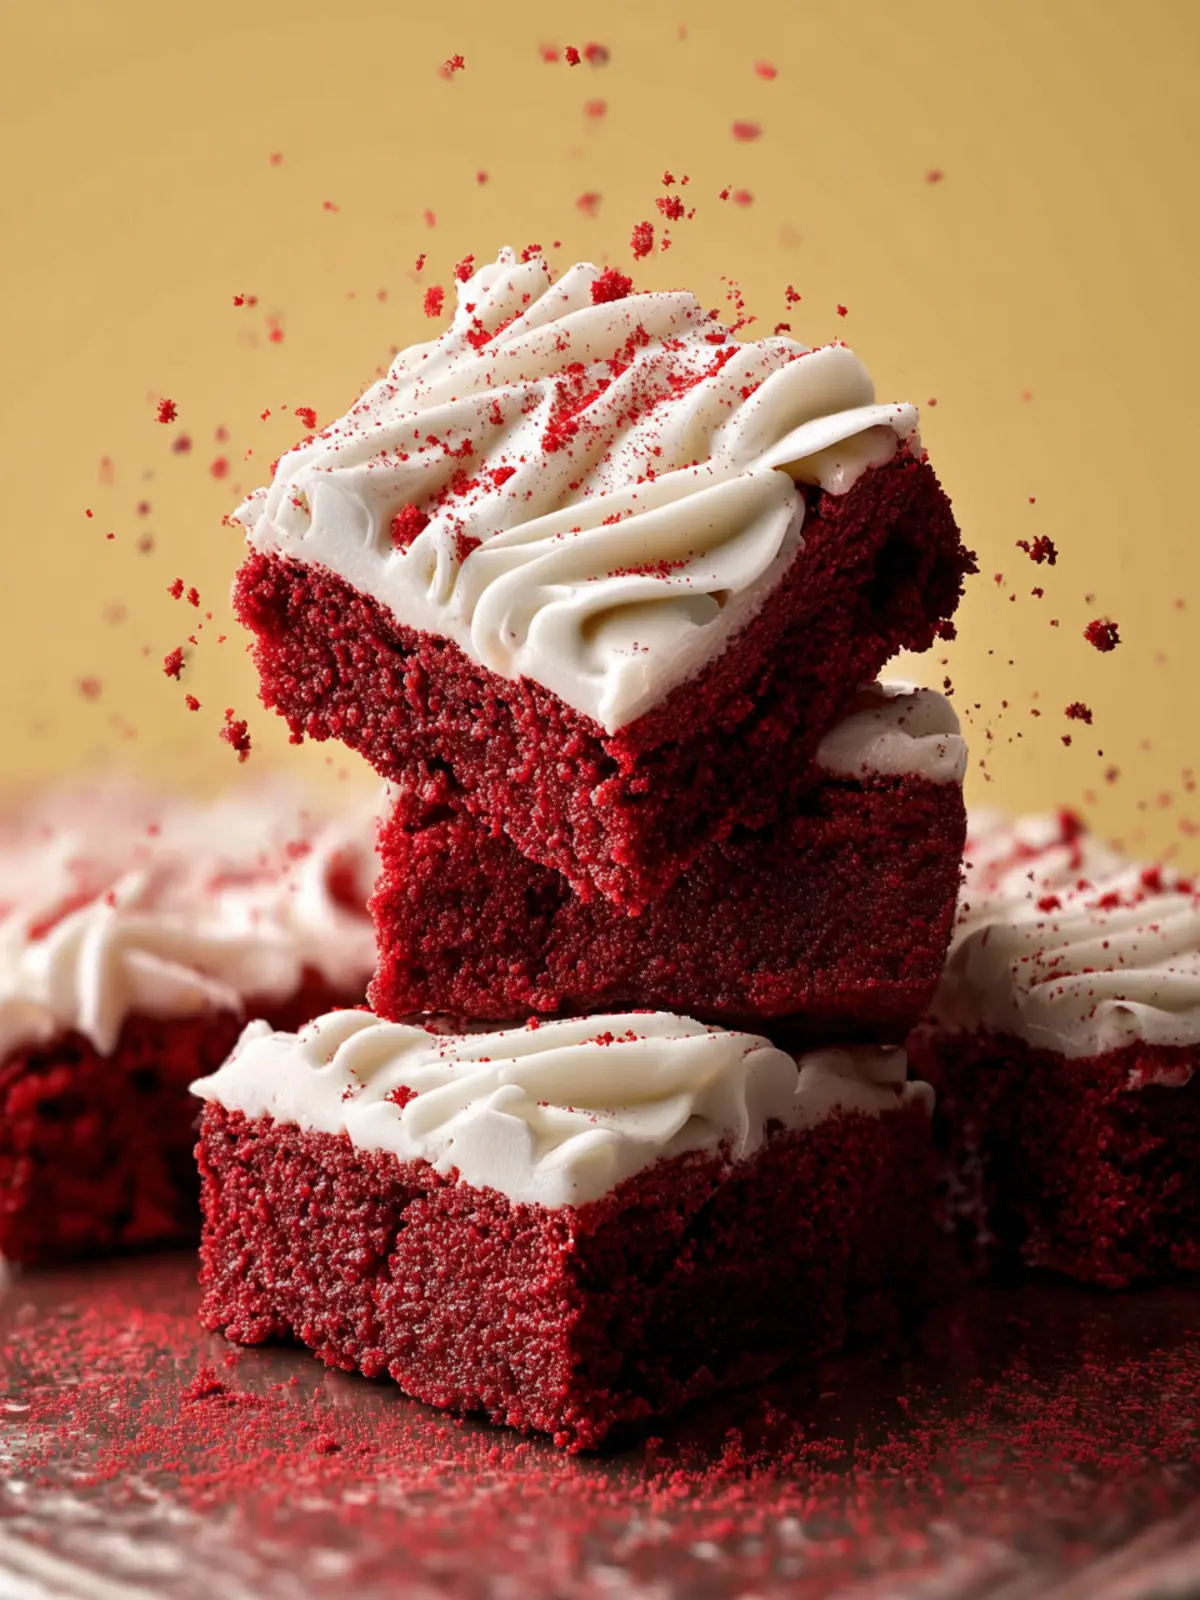
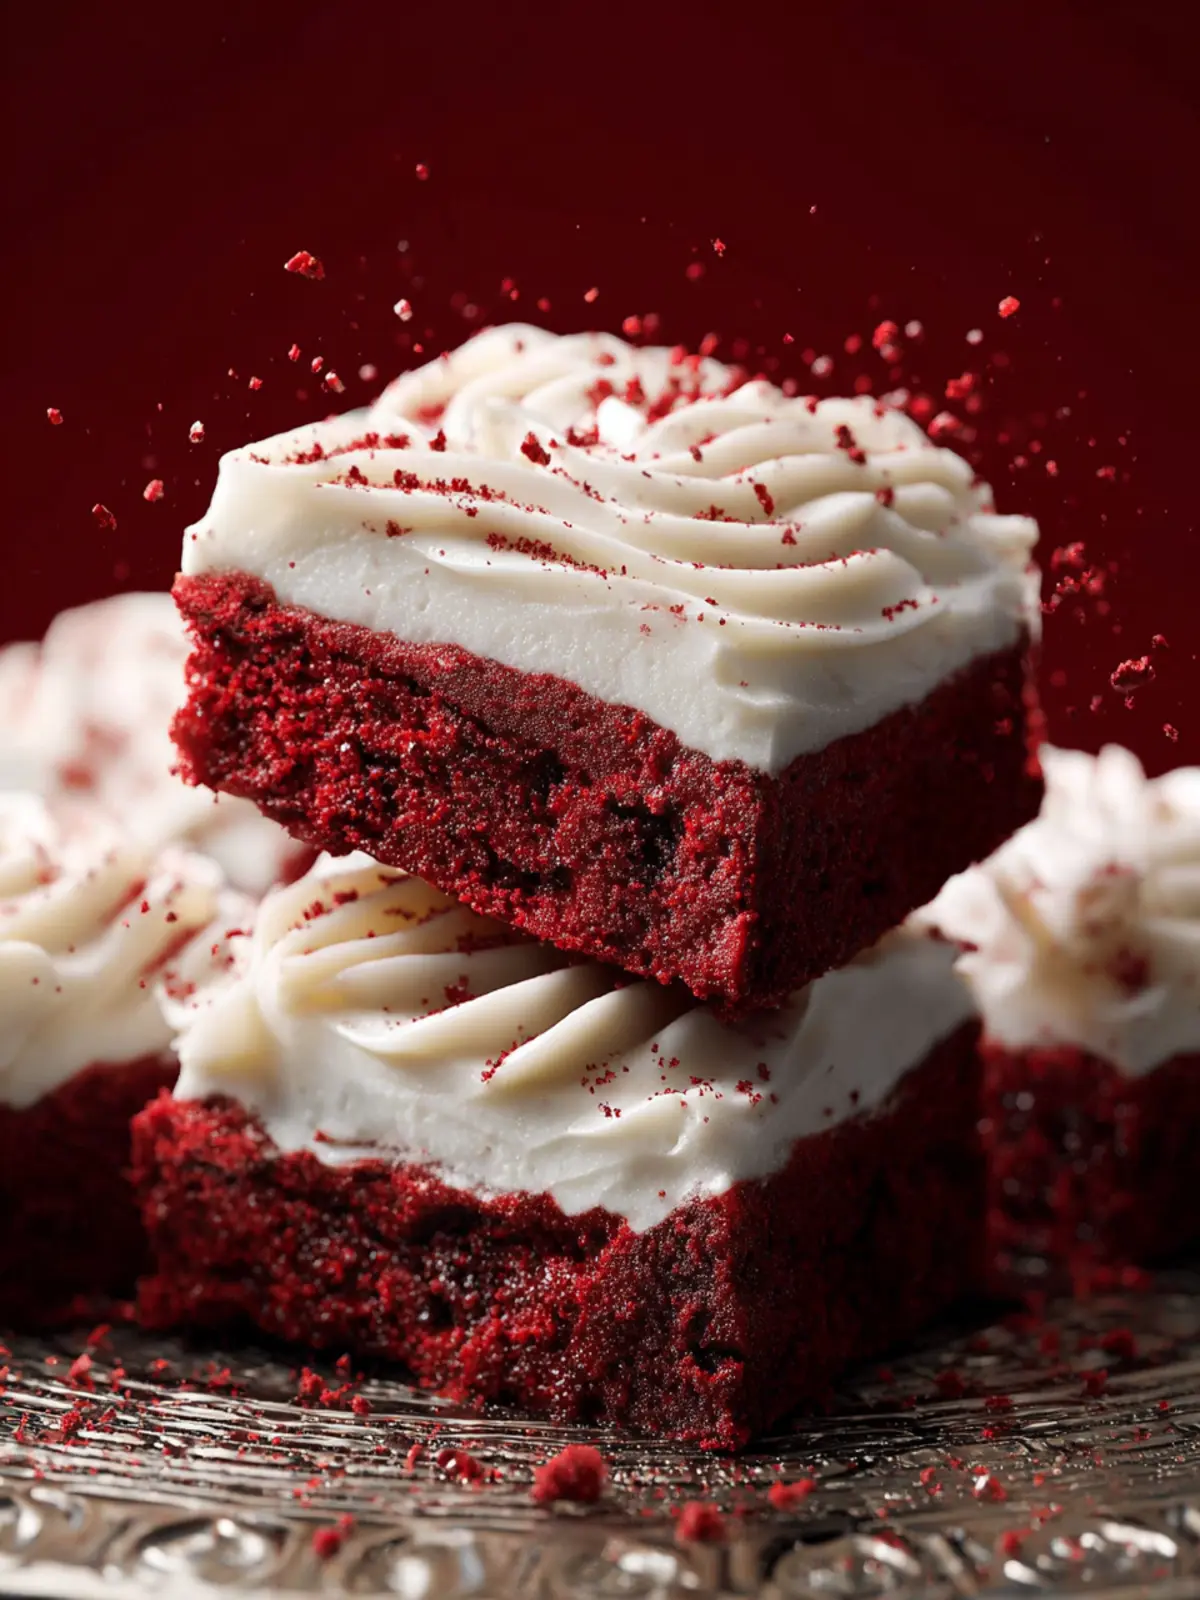
High Altitude Red Velvet Bars: Irresistibly Soft & Chewy
Introduction to High Altitude Red Velvet Bars
Baking High Altitude Red Velvet Bars is not just about following a recipe; it’s about capturing a unique essence that combines flavor, texture, and altitude into a delightful treat. As someone who has often faced the challenge of whipping up sweet creations at high elevations, I can assure you that conquering red velvet bars at 5,000 feet is a delicious journey worth taking.
High altitude baking presents its own quirks—think variations in temperature, pressure, and humidity—and these factors can dramatically influence the end result of your baked goods. When you’re crafting these charming red velvet bars, understanding how altitude affects the ingredients and their interactions can mean the difference between a chewy disaster and a perfect batch of rich, velvet-infused delights.
What makes high altitude baking unique?
At elevations above 3,000 feet, the atmosphere presents some interesting challenges; here’s what you need to know to succeed with your High Altitude Red Velvet Bars:
-
Lower Air Pressure: At higher altitudes, the air pressure drops, leading to faster evaporation of liquids. This can mean your baked goods may dry out if not properly adjusted. Increasing the liquid content or incorporating ingredients like sour cream can help maintain moisture.
-
Leavening Adjustments: With lower atmospheric pressure, batters and doughs rise more quickly. To prevent over-expansion, consider reducing the amount of baking powder or baking soda slightly. This ensures that your red velvet bars achieve that perfect rise without collapsing.
-
Oven Temperature: Think about raising your oven temperature by about 15-25 degrees Fahrenheit. Higher heat helps set the structure of your bars before they can rise too much.
-
Flour Tuning: High altitude often calls for a touch more flour, as this helps strengthen the batter’s structure. Using all-purpose flour is standard, but testing out variations might yield a more satisfying result.
With these considerations in mind, you’re well on your way to mastering the art of creating luscious High Altitude Red Velvet Bars that are sure to impress. Now that we’ve laid the groundwork, let’s dive into the ingredients that will make your baking adventure enjoyable and successful.
Key Ingredients for High Altitude Red Velvet Bars
Crafting High Altitude Red Velvet Bars isn’t just a baking challenge—it’s an opportunity to create a rich, delicious treat that mirrors the beauty of your high-altitude surroundings. Every ingredient plays a crucial role in achieving the right flavor and texture.
-
Butter: The foundation of any great dessert, butter lends richness to our bars. Opt for unsalted butter to control the saltiness, ensuring a balanced sweetness that complements the earthy cocoa powder.
-
Sugar: I prefer a blend of granulated sugar and brown sugar. The granulated sugar sweetens while the brown sugar adds moisture and depth, giving those velvety bars their signature chewiness.
-
Cocoa Powder: Unsweetened cocoa powder carries essential chocolatey flavor and color. I recommend using a high-quality brand, as this really enhances the overall taste of the bars.
-
Eggs: Fresh eggs contribute structural integrity and moisture. In high altitude, they help lift while maintaining that garnish of moisture that we all crave.
-
Flour: For these bars, all-purpose flour strikes the perfect balance. However, in high-altitude baking, you might consider reducing the flour slightly to achieve a fluffier texture.
-
Buttermilk: This tangy addition not only enriches the bars but also ensures they remain moist. If buttermilk isn’t on hand, a simple mix of milk and vinegar will do the trick.
-
Baking Powder and Baking Soda: A perfect duo to help the bars rise appropriately at altitude, creating that soft, tender crumb we all love.
Each ingredient is carefully selected to harmonize, bringing out the best in these High Altitude Red Velvet Bars. Now, let’s get baking!
Why You’ll Love These Red Velvet Bars
High altitude baking often feels like a challenging puzzle, but these High Altitude Red Velvet Bars transform the experience into sheer joy. Picture a cozy gathering with friends, where you unveil these rich, velvety bars that boast a striking red hue. As you cut into them, the moist texture glistens, tempting everyone around you. It’s not just about the look; it’s the delightful surprise of subtly tangy cream cheese frosting that elevates each bite.
You’ll appreciate how simple these bars are to make, yet they deliver an impressive presence that makes any occasion feel special. Their versatility means they can easily transition from a cozy weeknight treat to a show-stopping centerpiece for a celebratory event. Friends and family won’t stop at one; they’ll be raving about the enchanting flavor long after the last crumb has disappeared.
With ingredients that strike the perfect balance between sweet and tangy, your taste buds will dance with excitement. Whether you’re a seasoned baker or just starting out, these bars are approachable yet indulgent. Once you experience these High Altitude Red Velvet Bars, you’ll find they capture the essence of sweet moments shared with loved ones in every delicious bite.

Tips for Making High Altitude Red Velvet Bars
Creating high altitude red velvet bars can be a delightful challenge, one that combines the art of baking with a sprinkle of science. At altitudes above 3,000 feet, our favorite treats can sometimes resist that perfect texture. Follow these handy tips to elevate your baking experience and achieve bars that are as rich and moist as they are beautiful.
Adjust the Flour and Sugar
When you’re at a higher elevation, reducing flour by about two tablespoons for every cup is a smart move. This prevents the bars from turning out too dry or crumbly. Likewise, you might want to decrease the sugar slightly, as high altitude can cause excessive sweetness.
Modify Baking Time and Temperature
You’ll find that your bars bake faster at high altitudes, so keep an eye on them. Consider lowering the oven temperature by 25 degrees Fahrenheit to maintain even cooking and prevent them from overbaking on the edges while remaining undercooked in the center.
Add Moisture
Altitude can dry out your baked goods, so incorporating an extra tablespoon of sour cream or buttermilk can enhance moisture levels. This small addition pays off, making your red velvet bars wonderfully tender.
Elevate with Eggs
Whipping your eggs a bit longer encourages more air incorporation. This helps create a light, fluffy texture. Just be cautious of adding too much air; keeping it balanced is key to scrumptious bars.
By following these tips, your journey into high altitude red velvet bars will not only be successful but also incredibly rewarding! Happy baking!
Time Details for High Altitude Red Velvet Bars
Making High Altitude Red Velvet Bars involves carefully planned timings to achieve that perfect texture and taste. Here’s a breakdown of the essential time components you’ll need.
Preparation Time
Set aside about 15 minutes for preparation. This includes gathering your ingredients, preheating the oven, and mixing the batter to ensure everything is perfectly blended together.
Baking Time
For wonderfully baked High Altitude Red Velvet Bars, you’ll need approximately 25-30 minutes in the oven. Keep an eye on them in those last few minutes, as high altitude can impact baking times.
Cooling Time
After removing the bars from the oven, allow them to cool in the pan for about 10 minutes before transferring to a wire rack. Let them cool completely for at least another 30 minutes before frosting, so that every bite is just right.
Nutritional Information for High Altitude Red Velvet Bars
When tackling a sweet treat like High Altitude Red Velvet Bars, it’s good to know what you’re indulging in! Here’s a quick glimpse at the nutritional profile to keep you informed and inspired.
Calories
Each serving of these delightful bars packs approximately 200 calories. Perfect for satisfying that sweet tooth without derailing your day!
Fat
With around 9 grams of fat per serving, these bars strike a balance between decadence and moderation. The fat comes primarily from butter and cream cheese, lending rich flavor and texture.
Sugars
You can expect about 12 grams of sugar in each serving. This sweetness is derived from granulated sugar and the natural sweetness of cocoa, creating those oh-so-delicious layers of flavor that make red velvet so special.
Enjoy making and sharing these High Altitude Red Velvet Bars with friends, knowing you have the knowledge to enjoy every bite responsibly!
FAQs about High Altitude Red Velvet Bars
Baking High Altitude Red Velvet Bars can be a delightful and rewarding experience, yet it comes with its own unique set of challenges. Let’s dive into some frequently asked questions about these delicious treats.
How does high altitude affect baking?
At higher altitudes, the decreased air pressure can lead to quicker evaporation of moisture, affecting the texture and rise of your baked goods. You might find that your High Altitude Red Velvet Bars require adjustments like:
- Less sugar: Too much sugar can make your bars overly sweet and dense.
- Increased liquid: Since moisture evaporates faster, a little extra liquid can help maintain the right consistency.
- Adjusting the leavening agents: You may need less baking powder or baking soda, as your bars may rise too rapidly and then fall.
Keep these adjustments in mind to ensure your bars turn out perfectly.
What can I substitute for cream cheese frosting?
If you’re not a fan of traditional cream cheese frosting, there are several delicious alternatives for your High Altitude Red Velvet Bars, such as:
- Buttercream frosting: A classic choice that complements the richness of red velvet.
- Whipped cream: For a lighter option, consider using whipped topping or lightly sweetened heavy cream.
- Chocolate ganache: This indulgent topping provides a rich contrast to the tangy red velvet.
Can I make these bars ahead of time?
Definitely! Preparing your High Altitude Red Velvet Bars in advance can save time and effort on special occasions. Just be sure to:
- Store them properly: Keep the bars in an airtight container at room temperature for up to three days, or in the fridge if you’ve added frosting.
- Freeze for longer storage: You can freeze the unfrosted bars for up to three months. Just thaw them at room temperature before serving.
These tips ensure that your bars remain moist and delicious, even after a few days!
Conclusion on High Altitude Red Velvet Bars
Creating the perfect High Altitude Red Velvet Bars is more than just following a recipe; it’s about understanding the unique challenges that come with baking at altitude. While the vibrant red color and creamy frosting are show-stoppers, the real victory lies in overcoming those altitude-related obstacles. By adjusting baking times and ingredient ratios, you’ll discover a delightful balance that makes these bars both tender and rich. Remember, experimentation is key, and each batch is a new opportunity to hone your skills. Enjoy every delicious bite—because these bars are made for sharing and celebrating life’s sweetest moments.
Print
Red Velvet Cream Cheese Bars
- Total Time: 6 hours
- Yield: 16 squares 1x
- Diet: Vegetarian
Description
Delicious red velvet bars topped with creamy frosting.
Ingredients
Scale
- 1 cup unsalted butter, (melted)
- 1 cup granulated sugar
- 3 tbsp light brown sugar
- 2 large eggs
- 1 tbsp vanilla extract
- 1 1/4 tsp “super red” gel food coloring
- 2 3/4 cups all-purpose flour, (fluffed, spooned and leveled)
- 5 tbsp unsweetened Dutch processed cocoa powder
- 1 tbsp corn starch
- 1 tsp baking powder
- 1/2 tsp cream of tartar
- 1/2 tsp coarse Kosher salt
- 4 oz block cream cheese, (cold)
- 1/2 cup unsalted butter, (softened to room temperature)
- 2 1/2 cups powdered sugar
- 1/8 tsp coarse Kosher salt
Instructions
- Preheat the oven to 350 F, and position a rack in the center of the oven. Line a 9-inch baking pan with parchment paper, to make it easier to lift out and cut the cooled bars.
- In a large bowl, whisk together the melted butter with the granulated sugar, brown sugar, eggs, vanilla and red food coloring, until well combined.
- In a separate bowl, sift together the flour, cocoa powder, corn starch, baking powder, cream of tartar and salt. Add the dry ingredients to the liquid mixture, and stir just until the flour is incorporated and you have a soft dough.
- Use an offset spatula to spread the dough evenly into the prepared pan. Bake for 20-22 minutes, until the bars have risen slightly, and the center is set. If you bake them for longer, they may end up too dry.
- Set the pan on a cooling rack. Cool completely, at least 4-6 hours, before cutting. You can even make these the night before, cover the pan with plastic wrap and cool overnight, before frosting the next day.
- In the bowl of your stand mixer fitted with the paddle attachment, beat the cold cream cheese for about 1 minute, until smooth. Add the butter and beat together until well combined.
- With the mixer on low, add the powdered sugar by spoonfuls, the corn starch, salt and vanilla.
- Beat on medium speed for about 3 minutes, until light and fluffy.
- Spread the frosting over the cooled bars, or pipe it on using tip 1M for a more decorative finish.
- Cut into 16 squares.
Notes
- Cover the bars with plastic wrap and cool overnight for best results.
- If using table salt instead of Kosher salt, use half the amount.
- Prep Time: 20 minutes
- Cook Time: 22 minutes
- Category: Dessert
- Method: Baking
- Cuisine: American
Nutrition
- Serving Size: 1 square
- Calories: 300
- Sugar: 25g
- Sodium: 200mg
- Fat: 15g
- Saturated Fat: 8g
- Unsaturated Fat: 5g
- Trans Fat: 0g
- Carbohydrates: 40g
- Fiber: 1g
- Protein: 3g
- Cholesterol: 80mg