Follow Me On Social Media!

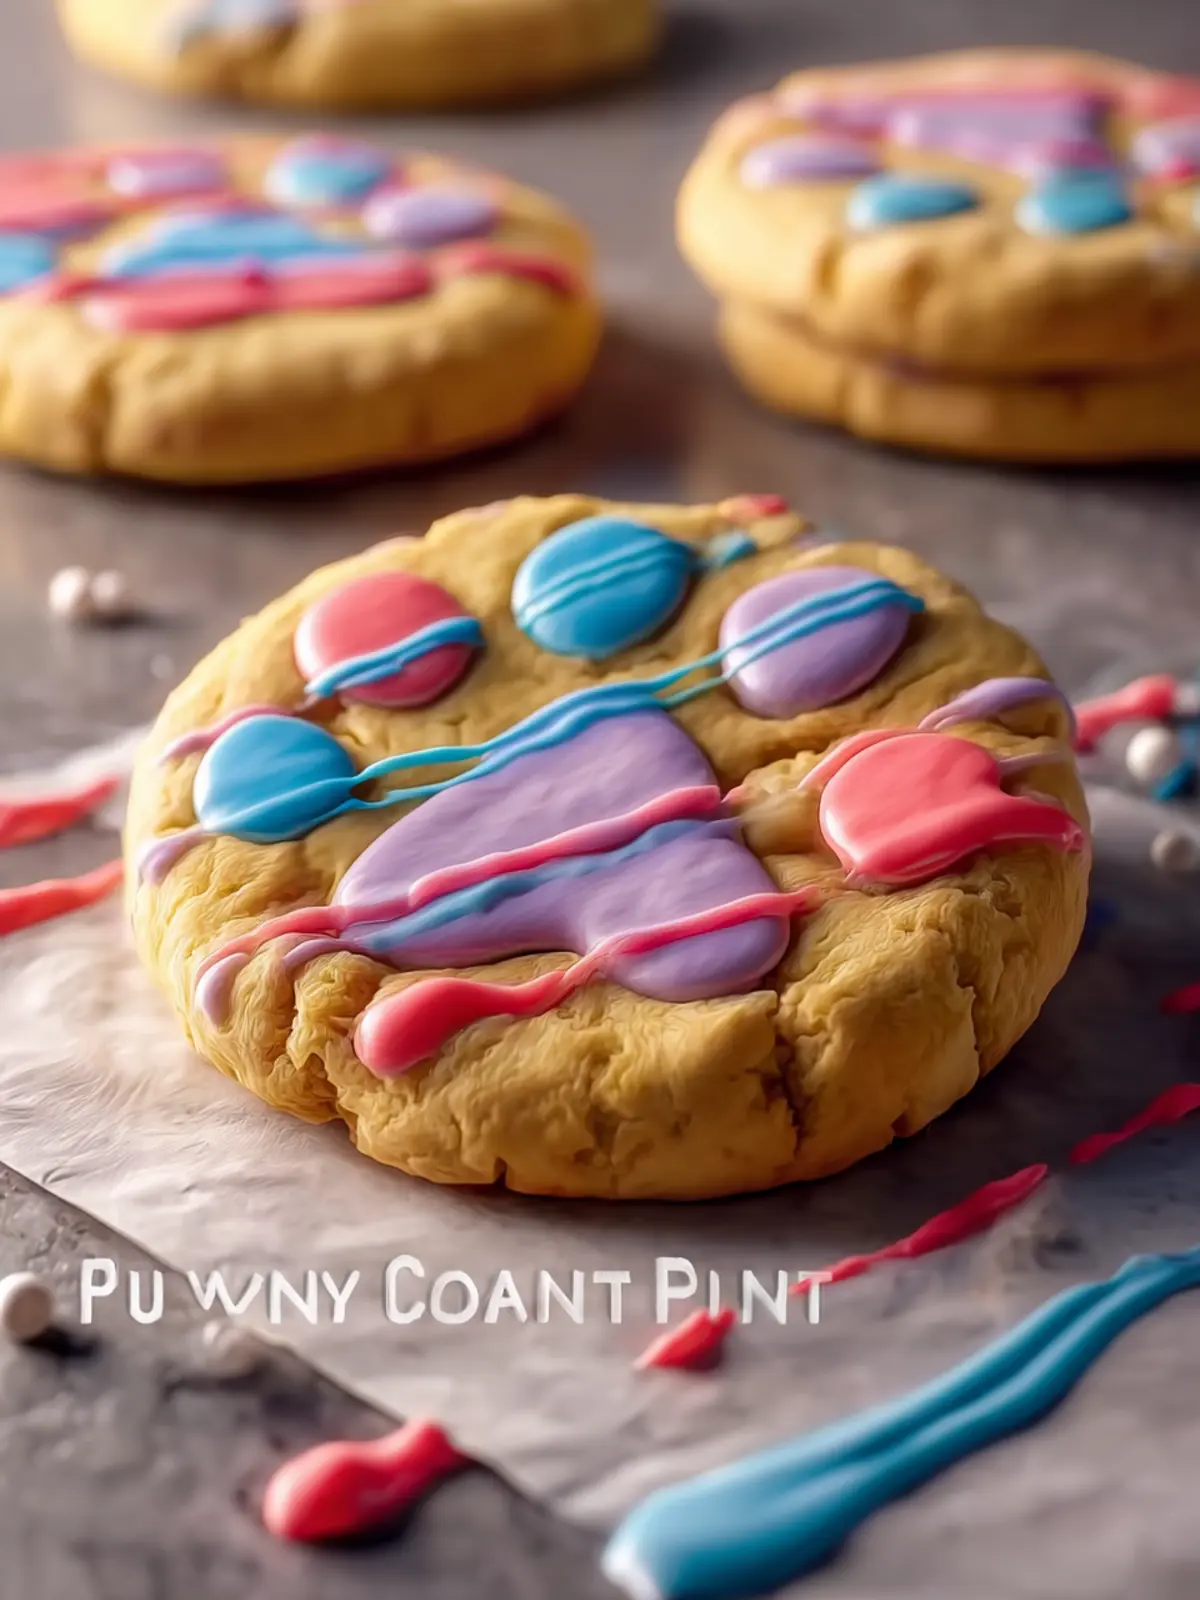
Bunny Paw Print Cookies: The Cutest Treat You’ll Ever Bake
Introduction to Bunny Paw Print Cookies
Imagine a sunny afternoon filled with the delightful aroma of freshly baked bunny paw print cookies, inviting friends and family to gather around the kitchen. These charming treats aren’t just a feast for the taste buds; they embody the joy of creating something special with your own hands. Each cookie isn’t merely a sweet bite; it represents a moment shared, a story told, and a memory made, especially during festive times like Easter or spring gatherings.
Why Making Cookies Can Be a Fun Activity
Creating bunny paw print cookies isn’t just about mixing ingredients; it’s a holistic experience that brings people together. What could be more comforting than baking while chatting with friends or family? Here’s why you should consider tackling this delicious project:
- Sparking Creativity: Decorating these cookies can unleash your inner artist. From choosing colors for the icing to arranging the fondant paws, you can customize each cookie to reflect your personality or occasion.
- Bonding Moments: Baking together fosters teamwork. Whether you’re a seasoned baker or a newbie, there’s something beautifully collaborative about measuring flour or rolling out dough. It’s these moments that deepen relationships and create lasting memories.
- Therapeutic Experience: Mixing and kneading can be quite therapeutic. The repetitive actions are a great way to relieve stress, allowing you to enjoy the simple act of baking while focusing your mind on the task at hand.
- Culinary Learning: As you experiment with cookie dough and toppings, you’ll pick up valuable baking skills and techniques. Did you know the right temperature can make all the difference in cookie texture? This recipe is an ideal chance to unlock your baking potential.
- Delicious Rewards: Of course, one of the best parts of baking is the end product. Once the cookies are baked and decorated, you can indulge in the delicious results of your labor—sharing them with loved ones or keeping them all to yourself!
So, ready your apron, gather the ingredients, and let’s dive into making delightful bunny paw print cookies that are sure to impress!
Key Ingredients for Bunny Paw Print Cookies
Creating irresistibly delightful bunny paw print cookies is all about using the right ingredients. Each component plays a crucial role in achieving the perfect balance of flavor and texture, making these cookies a standout treat for any occasion.
-
Flour: The foundation of any cookie, I prefer all-purpose flour for its versatility. It gives the cookies a sturdy structure without being too crumbly, making them easy to shape and decorate.
-
Butter: Using unsalted butter enhances the flavor. I find that letting it soften at room temperature not only makes mixing easier but also helps achieve that wonderful melt-in-your-mouth texture.
-
Sugar: A mix of granulated and brown sugar lends the cookies just the right amount of sweetness. Brown sugar adds moisture and a hint of caramel flavor that the bunnies will love!
-
Eggs: These binders add richness and help the cookies rise beautifully. I recommend using large eggs for consistency.
-
Vanilla Extract: A splash of pure vanilla extract elevates the overall flavor profile, adding warmth and sweetness that truly brings the cookies to life.
-
Baking Soda: This ingredient gives the cookies their lift while keeping them soft and chewy, ensuring a delightful texture.
With these key ingredients in hand, you’re all set to craft your own batch of bunny paw print cookies that will impress friends and family alike!
Why You’ll Love This Recipe
Bunny paw print cookies are not just a treat; they are a delightful experience that brings a touch of whimsy to any gathering. Imagine the joy of baking alongside friends or family, laughter filling the kitchen as you roll out dough and shape paw prints. These cookies are not only cute but also incredibly versatile, perfect for any festive occasion or simply to brighten up a regular day.
Fun for All Ages
The beauty of creating bunny paw print cookies lies in their simplicity. They’re perfect for both novice bakers and seasoned pros, allowing everyone to participate. Whether you’re crafting these adorable cookies for a spring celebration or a cozy family night, the upbeat energy they bring is palpable.
Deliciously Sweet
With a combination of flavors and textures, each bite offers a satisfying crunch with a sweet vanilla finish. The creamy frosting adds a layer of indulgence that beautifully complements the soft cookie base. Plus, you can get creative with colors and designs, making each cookie a unique piece of art.
A Memorable Treat
Bunny paw print cookies are bound to spark conversation and create lasting memories. Just imagine setting a platter full of these adorable cookies at your next get-together—the smiles, the stories, and the shared moments around baking together. Once you try this recipe, you’ll understand why it’s a must-have for your baking repertoire.
Variations on Bunny Paw Print Cookies
Bunny paw print cookies are just the beginning of your baking adventure! While the classic version is delightful on its own, personalizing these treats can elevate them to new levels. Here are some creative variations you can try.
Flavor Twists for Bunny Paw Print Cookies
-
Chocolate Chip Addition: For a more indulgent treat, fold in a cup of chopped chocolate or chocolate chips. The sweet chocolate flavor complements the buttery cookie base beautifully and adds a delightful contrast to the sweetness of the frosting.
-
Citrus Zest: Add a teaspoon of lemon or orange zest to the dough for a fresh twist. The citrus notes brighten the flavor and remind you of sunny spring days.
Decorating Ideas
-
Different Frosting Colors: Experiment with various colored frostings. Perhaps pastel shades for spring or even bold colors for a fun party theme. This allows for a playful presentation that resonates with different occasions.
-
Sprinkle Toppers: Before the frosting sets, sprinkle colorful nonpareils or edible glitter on top of the paw prints. This not only makes the cookies visually appealing but adds a bit of crunch to each bite.
Alternative Ingredients
- Gluten-Free Substitutes: If you have gluten sensitivity, consider using a 1:1 gluten-free flour blend. This maintains the cookie’s texture while accommodating individual dietary needs.
Incorporating these variations ensures that your bunny paw print cookies remain a hit, offering something delightful each time you bake. Which twist are you excited to try first?
Cooking Tips and Notes for Bunny Paw Print Cookies
Creating the perfect bunny paw print cookies is not only a fun activity but also a delightful way to celebrate springtime or a special occasion. Here are some practical tips to ensure your cookies come out just right, tasting as delightful as they look.
Use Room Temperature Ingredients
For optimal texture, make sure your butter and eggs are at room temperature before mixing. This ensures a smooth, creamy dough that bakes evenly.
Chill Your Dough
Chilling your dough for at least an hour before rolling it out will keep your cookies from spreading too much. This is key for retaining those adorable paw prints!
Flour Your Surface
When rolling out dough, sprinkle a little flour on your work surface. This helps prevent sticking and allows for easy shaping of those cute bunny paw prints.
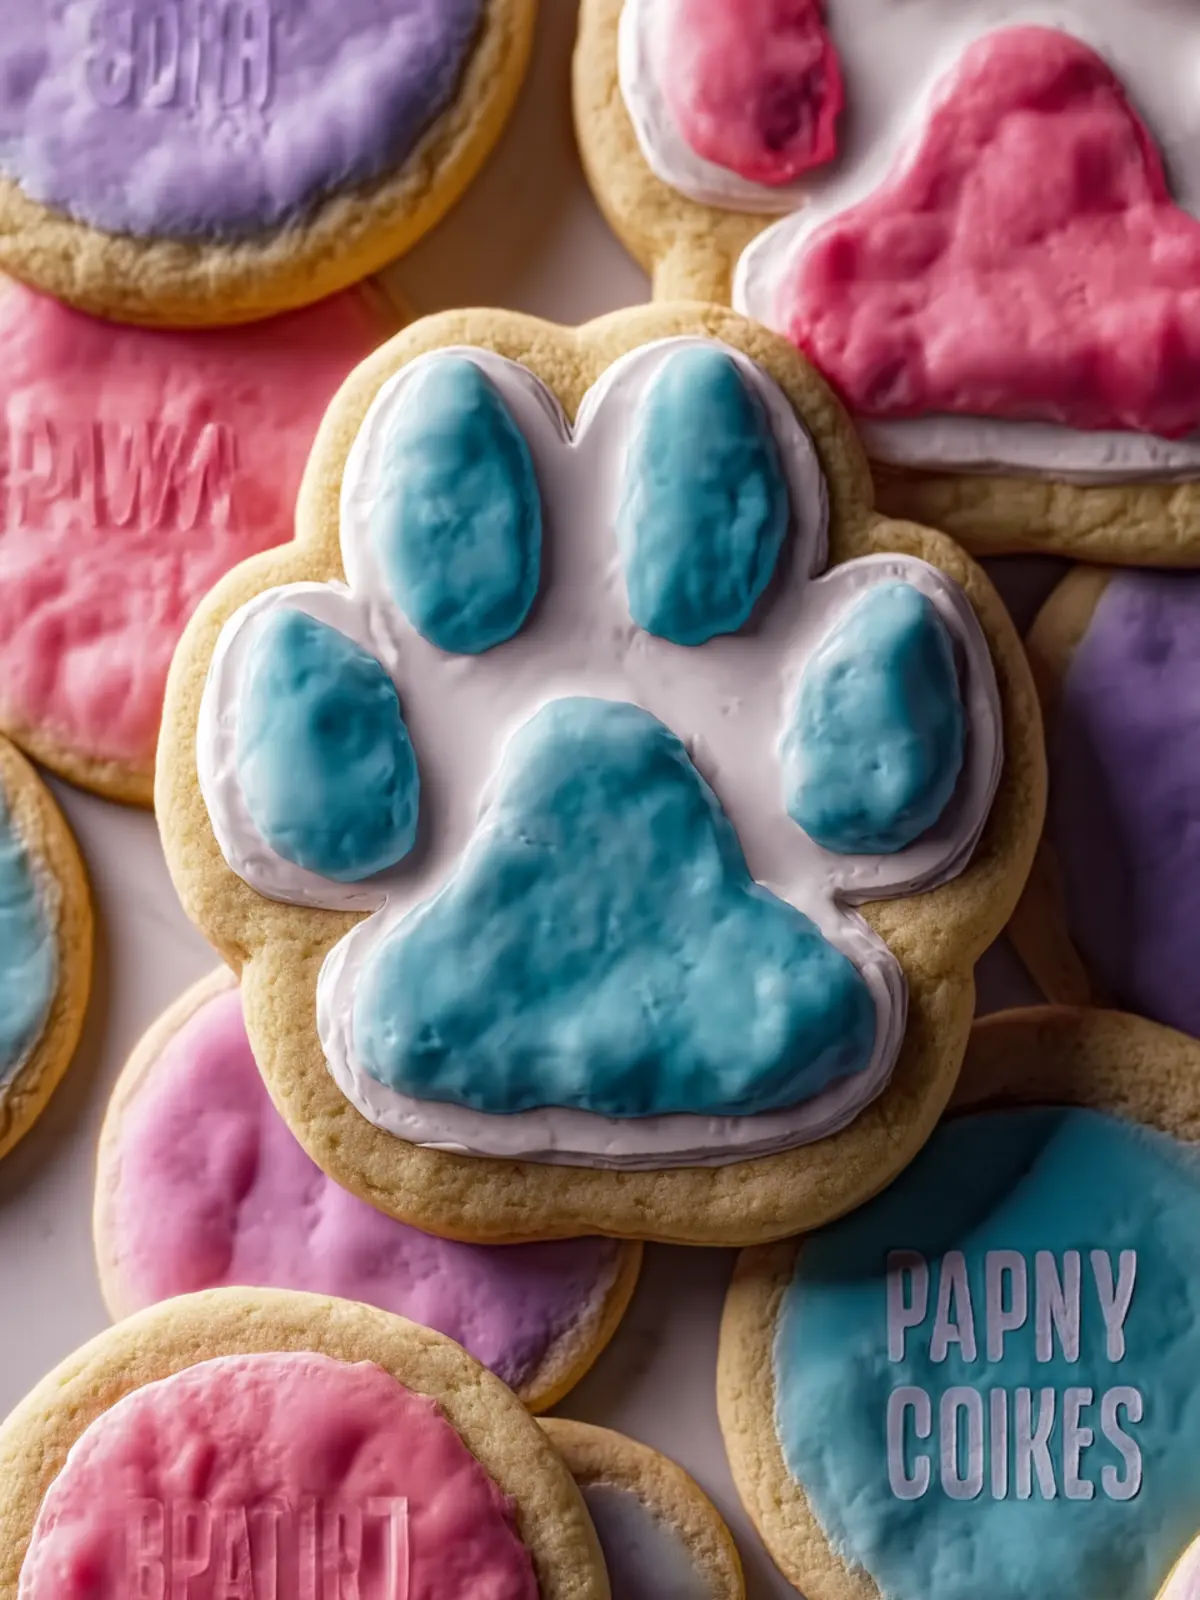
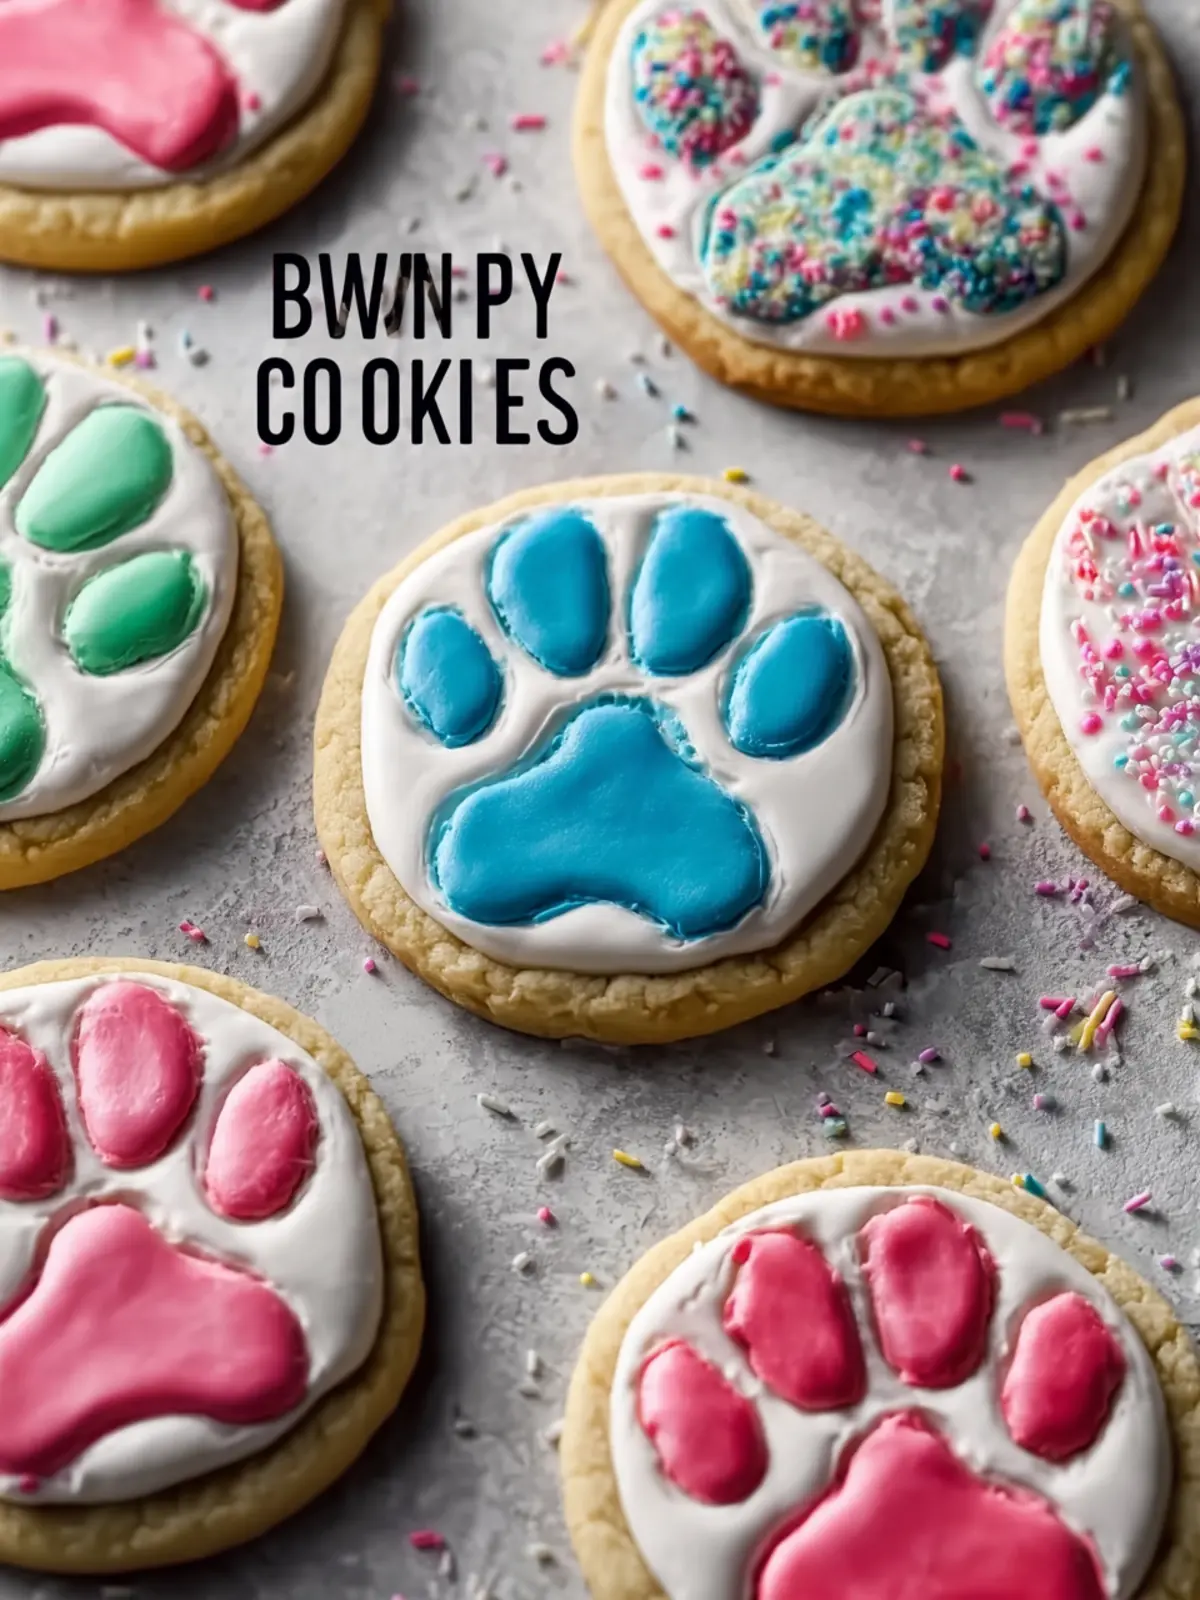
Be Creative with Colors
For added fun, use different colors of icing to decorate your bunny paw print cookies. A fun pastel palette can really enhance the festive look and make the cookies stand out.
Baking Time Matters
Keep a close eye on your cookies as they bake. Every oven is different, and even a couple of minutes can make a difference between chewy and crispy. Aim for a slight golden edge and a soft center.
By following these tips, you’ll not only enjoy the process but also impress your friends and family with delightful bunny paw print cookies that are as tasty as they are cute. Happy baking!
Serving Suggestions for Bunny Paw Print Cookies
Pairing your delightful bunny paw print cookies with the right accompaniments can elevate the experience. These adorable treats not only look fantastic but also cater to various tastes. Consider the following serving ideas:
-
Beverage Pairings: These cookies go wonderfully with a cup of freshly brewed coffee or a light herbal tea. The warmth of the drink complements the sweetness of the cookies perfectly.
-
Presentation: Arrange your bunny paw print cookies on a decorative platter, surrounded by pastel-colored candies or chocolate eggs for a charming springtime display.
-
Festive Touches: For a fun twist, serve them at gatherings alongside themed cupcakes or a carrot cake. This creates a delightful dessert table that will impress your guests.
By exploring these serving suggestions, you can turn your baking into a festive celebration.
Time Breakdown for Bunny Paw Print Cookies
When indulging in the delightful experience of making bunny paw print cookies, every minute spent in the kitchen counts! Here’s a useful breakdown of your time commitment for these fun treats.
Preparation Time
Set aside about 20 minutes to gather your ingredients and get everything mixed for your dough. This is the stage where the magic begins!
Chilling Time
To ensure the dough holds its shape, chill it in the fridge for at least 1 hour. This time is essential for making the cookies extra adorable.
Baking Time
The actual baking process only takes around 10-12 minutes. Keep an eye on them; you want that perfect golden edge!
Decorating Time
Once cooled, add about 30 minutes for decorating. This is where you can let your creativity shine with frosting and sprinkles.
Total Time
In total, you’re looking at approximately 2 hours, including chilling and decorating. Perfect for a fun afternoon project!
Nutritional Facts for Bunny Paw Print Cookies
When you bake a batch of delightful bunny paw print cookies, it’s essential to know what you’re indulging in. These charming cookies are not just adorable; they also pack a nutritional punch!
Calories
Each bunny paw print cookie contains approximately 150 calories. A perfect treat to enjoy without completely derailing your daily caloric intake.
Total Fat
In these cookies, you’ll find about 6 grams of total fat per serving. Most of this comes from butter, contributing to their rich and buttery flavor.
Carbohydrates
One cookie has around 22 grams of carbohydrates. This energy boost makes them an enjoyable snack, especially during creative baking sessions with friends or family.
By being mindful of these nutritional facts, you can savor each cookie guilt-free while appreciating the love that went into making them!
FAQs About Bunny Paw Print Cookies
Creating bunny paw print cookies can be a delightful yet complex endeavor, and it’s natural to have some questions as you embark on this sweet adventure. Let’s dive into some common queries that may enhance your baking experience!
Can I use alternative flours for this recipe?
Absolutely! If you’re looking to swap out all-purpose flour, consider using almond flour or a gluten-free flour blend. Almond flour will lend a nutty flavor, while gluten-free options can provide a similar texture for those needing a gluten-free treat. Just remember that the texture and spread of your cookies might vary slightly.
How do I store leftover cookies?
To keep your bunny paw print cookies fresh, store them in an airtight container at room temperature. They should stay good for about a week. For added freshness, you can place a slice of bread in the container; it helps to maintain moisture!
Can these cookies be frozen?
Yes, you can freeze your bunny paw print cookies! Place them in a single layer on a baking sheet to freeze initially, then transfer to a freezer-safe bag or container. They’ll last for up to three months. When you’re ready to enjoy them, just let them thaw at room temperature.
What if I don’t have meringue powder?
If meringue powder is out of reach, you can use egg whites instead. For every tablespoon of meringue powder, substitute with two egg whites. This will still give your royal icing the desired consistency and stability.
How can I achieve different designs with royal icing?
Experimentation is key! To create various designs on your bunny paw print cookies, you can adjust the consistency of your royal icing. For detailed work, aim for a thicker icing, and add a bit of water for flooding cookies. Using different piping tips or even simple squeeze bottles can help you achieve unique patterns and sizes effortlessly. Let your creativity shine!
By addressing these FAQs, you’ll be well-prepared to bake up a storm and impress everyone with your adorable bunny paw print cookies!
Conclusion on Bunny Paw Print Cookies
In wrapping up our delightful journey into the world of bunny paw print cookies, I hope you feel inspired to create these adorable treats for your next gathering. Not only do they please the eye with their whimsical design, but they also deliver a deliciously sweet flavor that will have everyone coming back for more. Remember, these cookies are perfect for parties, holidays, or simply a fun weekend activity with friends or family. Enjoy the process, embrace your creativity, and let your cookie-making reflect your personal touch. Happy baking, and may your kitchen be filled with joy and laughter as you whip up these charming bunny paw creations!
Print
Sugar Cookies with Royal Icing
- Total Time: 1 hour 30 minutes
- Yield: 24 cookies 1x
- Diet: Vegetarian
Description
Delicious sugar cookies decorated with royal icing, perfect for any occasion.
Ingredients
Scale
- 2 ¾ cups all-purpose flour
- 1 teaspoon baking powder
- ½ teaspoon salt
- 1 cup unsalted butter, softened
- 1 cup granulated sugar
- 1 large egg
- 2 teaspoons vanilla extract
- 3 cups powdered sugar
- 2 tablespoons meringue powder
- 5–6 tablespoons warm water
- ½ teaspoon vanilla extract
- Pink gel food coloring
- Blue gel food coloring
- White icing for paw prints
Instructions
- PREPARE THE COOKIE DOUGH: In a medium bowl whisk together flour, baking powder, and salt until evenly combined. In a separate large mixing bowl beat softened butter and granulated sugar until the mixture becomes light and fluffy, about 2–3 minutes. Add the egg and vanilla extract and mix until smooth. Gradually add the dry ingredients to the butter mixture while mixing on low speed until a soft, smooth dough forms.
- CHILL THE DOUGH: Shape the dough into a disk and wrap it tightly in plastic wrap. Place the wrapped dough in the refrigerator for 30 minutes so the butter firms and the dough becomes easier to roll.
- ROLL AND CUT THE COOKIES: Preheat the oven to 350°F (175°C) and line baking sheets with parchment paper. Lightly flour a work surface and roll the chilled dough to about ¼ inch thickness. Use a round cookie cutter about 3 inches wide to cut out circles. Transfer the cut cookies to the prepared baking sheets while leaving a small space between each cookie.
- BAKE THE COOKIES: Place the baking sheets in the oven and bake for 10–12 minutes until the edges turn lightly golden. Remove the cookies from the oven and allow them to cool completely on a wire rack before decorating.
- PREPARE THE ROYAL ICING: In a mixing bowl combine powdered sugar and meringue powder. Add warm water and vanilla extract. Beat the mixture until smooth and glossy. The icing should hold its shape but spread easily. Add a few drops of water if the icing becomes too thick.
- COLOR THE ICING: Divide the icing into three bowls. Add pink gel food coloring to one bowl and mix until a soft pastel shade forms. Add blue gel food coloring to another bowl and mix until smooth. Leave the third bowl white for the paw print decoration.
- DECORATE THE COOKIES: Spread a thin layer of pink or blue icing over each cooled cookie to create a smooth background. Allow the base icing to set for about 10 minutes. Using white icing, pipe or spoon a large oval shape in the center of each cookie to form the bunny paw pad. Add four small oval dots above the pad to create the toes. Let the icing fully set before stacking or storing the cookies.
Notes
- Ensure the butter is softened for easier mixing.
- Allow the icing to set for at least 10 minutes before decorating further.
- Prep Time: 30 minutes
- Cook Time: 12 minutes
- Category: Dessert
- Method: Baking
- Cuisine: American
Nutrition
- Serving Size: 1 cookie
- Calories: 150
- Sugar: 10g
- Sodium: 50mg
- Fat: 7g
- Saturated Fat: 4g
- Unsaturated Fat: 2g
- Trans Fat: 0g
- Carbohydrates: 22g
- Fiber: 0g
- Protein: 2g
- Cholesterol: 30mg